Any mom of a little boy knows that he loves to take his toys with him everywhere he goes. . . action figures, hotwheels cars, nerf guns, etc. I made these fun bandoliers for my little boys to be able to tote their things around. You can also find them in my etsy shop.
So fun and so easy for them to throw over their shoulders and take their goodies around with them.
About me
Hi! I'm Shelly - mother of 5 and wife to the best man in the world. We love to play games and watch movies together. I have a passion for crafting in all it's forms - sewing, scrapbooking, bow making, painting, mod podge, you name it and I'll try it. Hope you enjoy our family adventures and crafts!
How I Became Shared Jelly
When my husband and I first got married we used to get messages on our answering machine for "Shared" and "Jelly" instead of Jared and Shelly. The first time we chuckled a little over it and by the fourth or fifth time, we decided the name should stick somewhere. And so, I've been sharing jelly all over the internet since. Enjoy!
Pages
Showing posts with label For the Kids. Show all posts
Tuesday, June 12, 2012
Saturday, May 19, 2012
Updated Flip Flops
Ant to transform your flip flops like these!
I started with some regular baby flip flops. Her chubby little feet were just hurting in the hard plastic.
So I cut out the plastic and cut some fabric strips from an old t-shirt.
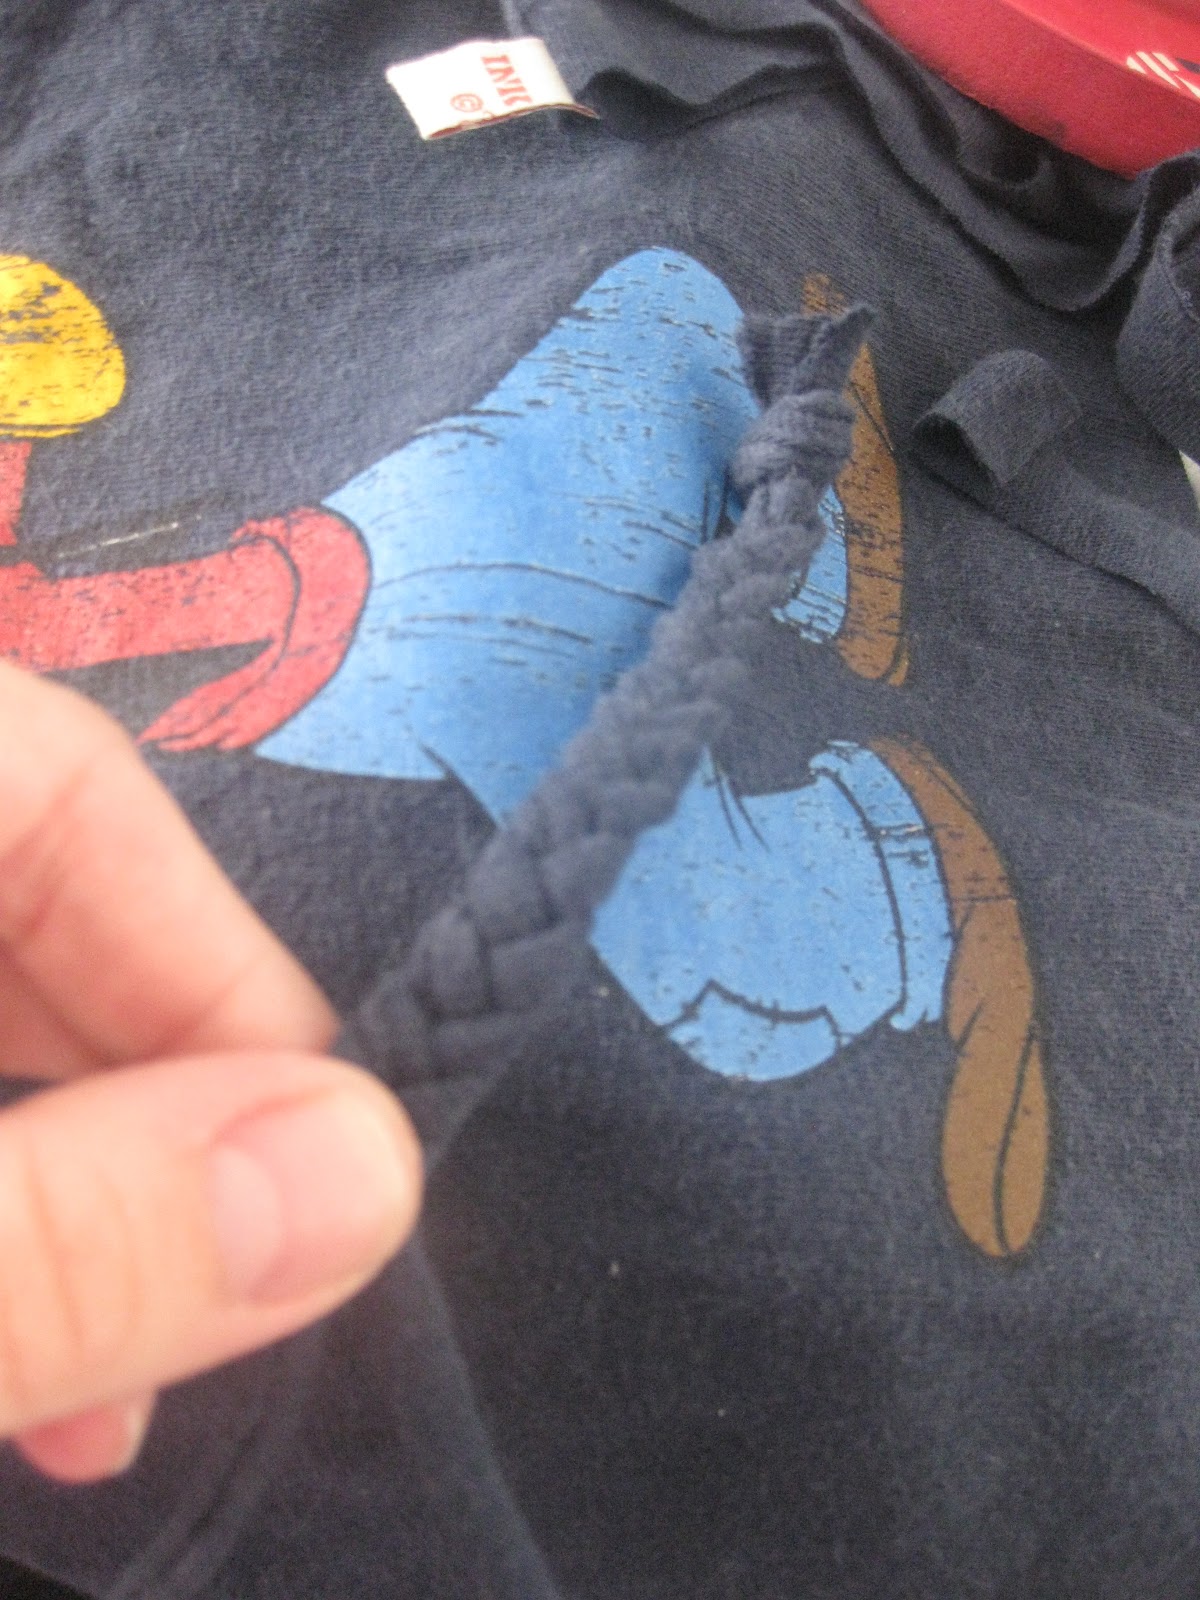
Then braided the strips in a regular braid.
I measured how long I wanted them in the sandal and tied off the ends. Remember that the knit will stretch a little so you'll want it to be snug on the foot.
Hot glue the ends in place.
Cut off the bulk of the knot with some good sharp scissors and fill in with hot glue.
Wrap some thread on the area that fits between the toes.
Now you are going to take some unbraided strips and feed them through the holes in the back. Loop over your braided piece and back down. Glue in place.
You can leave the sandals like this if you want.
I added a poofy flower embellishment for fun!
Enjoy!
Thursday, May 3, 2012
Nerf Dart Bandolier / Dart Holder
I don't know about you, but my little guys are in love with Nerf guns. I thought it would be cool to give them a place to carry all of their darts. I made them this Nerf Dart Bandolier. They love it. Can't use the guns without it anymore.
Sunday, April 8, 2012
Happy Easter!
We tried out a new egg dying technique this year and it paid off. You make your egg dye as usual (ours is 1 c. boiling water, 1 t. vinegar and 15 drops of food coloring), then add about 1/2-1 T. of oil. You stir the water and oil just before you drop the eggs in and you get a beautiful colorful swirly design on the eggs, see:
The kids had lots of fun with it and tried several color combinations. We used red, yellow, blue and green dye to create these. Have fun.
Monday, February 20, 2012
Hang Man
I made a felt version of Hangman that we could take with us when we travel or need something to keep us busy while we are waiting. I used the Melissa and Doug Hangman for inspiration and came up with this little guy.
I have a flat piece of red felt glued to a piece of cardboard for the backing. I made the little man out of felt that I hand stitched then made a bunch of letters using puffy paint. The great thing about felt is that things will stay in place on them pretty well (just like a felt board). I looked up how many of each letter they had in a standard scrabble game as a guide. We recently went on a long car trip and the kids enjoyed this little guy.
Friday, December 30, 2011
New Years Countdown Bags
I've seen different versions of these for the past couple of years and have adopted this into our new traditions.
You can check out Hoosier Homemade to see the idea here. There is a cute free printable here at The Idea Room.
At 6pm, we'll do a dinner of appetizers and finger foods (our tradition) and fill out a "Time Capsule" sheet.
At 7pm we'll play a board game together.
At 8pm we'll play rock band.
At 9pm, we'll enjoy rootbeer floats together and make some decorations & noise makers. I'm doing some rocket poppers (like on Martha Stewart's website) and paper plate tambourines.
Then at 10pm we'll watch the ball drop in New York on TV and turn on a movie to see how late they can all last.
It's going to be cheap and it's gonna be a fun one!
Balloons would also be fun! Maybe next year.
And the thing I'm most excited for is that I get to go see Wicked tomorrow! Finally! I'm probably the last one to see this of everyone I know and I'm excited.
Enjoy your new years celebrations!
Thursday, December 22, 2011
Gingerbread Houses?
First of all, we make ours of graham crackers-we always have them on hand. Second of all, houses are hard to build out of graham crackers and frosting - we've had several collapses. Third, we have mostly little boys. So this year, we got a little creative with our building. We did one house, a train, a car and a tank this year.
Monday, December 19, 2011
Giant Puzzle Poster
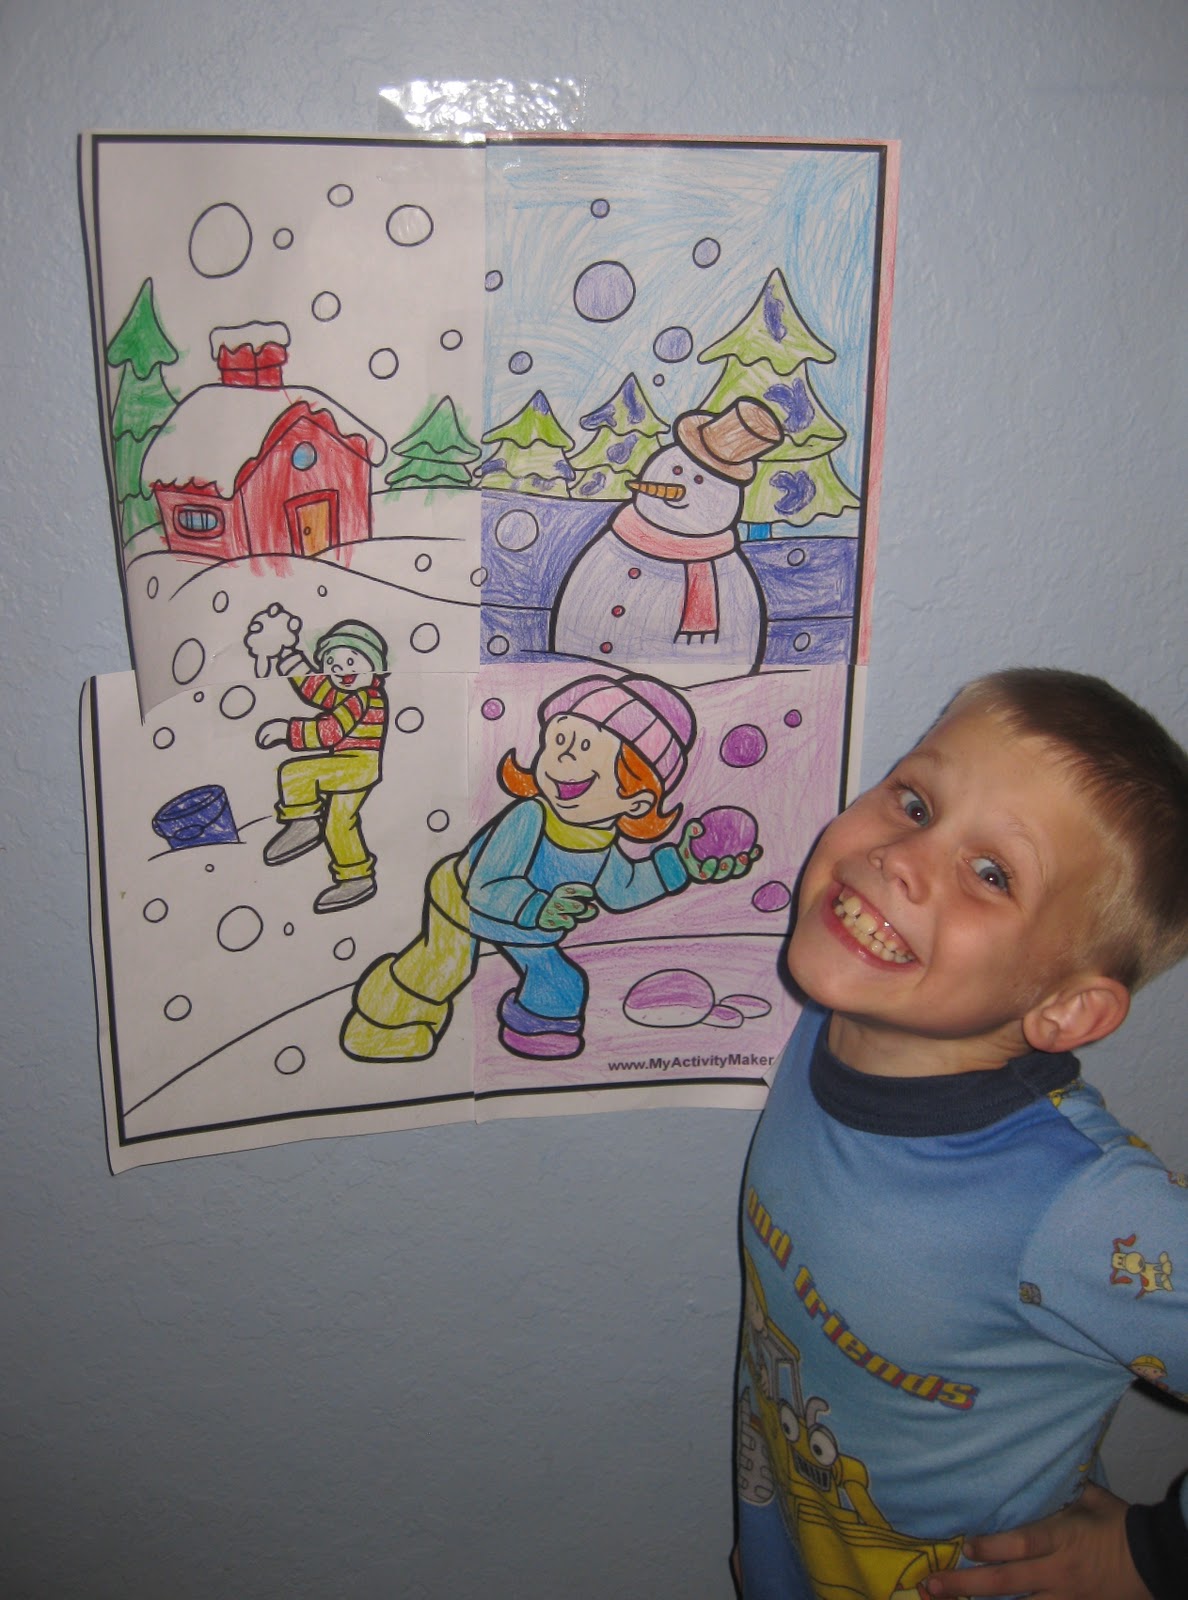
My son, Hunter, actually had this idea. He is always thinking of something. He asked if we could make a big picture that we each colored a part of and pieced them back together. I found a coloring page online and blew it up onto four sheets of paper for the kids to color (using Adobe Illustrator). Then, we pieced them back together. The kids love it.
Sunday, December 18, 2011
Kid Wreaths
I cut out a circle out of a paper plate and let the kids paint it green and decorate it with construction paper. Here are how they turned out.
Ornaments
I picked up these clear plastic ornaments at Michaels and we decorated them as a family activity this year. We put a little picture of each kid inside as well as a note telling a little message of their choosing. Then we colored them with permanent marker and glitter puff paint.
It was fun to do together. I think it would be fun to make ornaments together every year as a tradition.
Tuesday, December 13, 2011
Gingerbread Men
I found a package of these for $1 at Target and couldn't resist. Add buttons, markers and bits of ribbon and the kids have a blast.
( I just couldn't find any of the others to take pictures of)
Friday, December 9, 2011
Snowman Sticks
I'm trying to do some fun Christmas projects with the kids, so I've been hunting for ideas. Here is one I came across.
You'll need:
Popsicle sticks (the large ones)
Misc. Buttons
scrap of fabric (for the scarf)
black foam (or paper)
markers
whit paint
Put them all together and what do you get:
I like that each of the kids had their own spin on what they wanted their snowman to look like. It was a fun little project.
You'll need:
Popsicle sticks (the large ones)
Misc. Buttons
scrap of fabric (for the scarf)
black foam (or paper)
markers
whit paint
Put them all together and what do you get:
I like that each of the kids had their own spin on what they wanted their snowman to look like. It was a fun little project.
Tuesday, November 29, 2011
Quiet Book #2
I saw this idea on etsy here. It is a Spot the Dot quiet book. You use the red dot through the book as it transforms to new things on each page. The original is done in just black and white, but I made mine in lots of colors. I didn't have the printed sentences on the bottom, but I added a few pages, too. My pages are made from some sample swatches of curtain fabrics that my husband got when he was working for a company who does curtains/blinds. You could easily do it on felt instead. Anyways, you get the idea. I made this for my baby girl for Christmas. Hopefully it will keep her busy at church.
Christmas Gifts - On the Go Tin Buckets
This idea has been growing over the last month or so and here is what it has become.
I made these cute tin buckets for each of the kids. They are a fun little kit of goodies to take with them on long car trips, or vacations, or for waiting rooms, etc.
I started with these tin buckets that I found at Michaels and added their names in black vinyl.
On the inside of each lid I had some adhesive white board so they can doodle. Each one (except the baby) will have white board markers to color with.
Then I made some fun magnet games for each of them to play on outside of the lid (or anywhere on the tin for that matter).
Next I made some pouches for a pad of paper and crayons so they can write or draw.
I finished off each tin with a special new small toy. Overall cost of each tin came out to about $15 each. Now when we are headed out, I can tell the kids to grab their tins and put a couple of small toys inside to bring along and we'll be all set to be entertained. The only downside - metal tin buckets are not necessarily very quiet, but they do make really good drums!
I made these cute tin buckets for each of the kids. They are a fun little kit of goodies to take with them on long car trips, or vacations, or for waiting rooms, etc.
I started with these tin buckets that I found at Michaels and added their names in black vinyl.
On the inside of each lid I had some adhesive white board so they can doodle. Each one (except the baby) will have white board markers to color with.
Then I made some fun magnet games for each of them to play on outside of the lid (or anywhere on the tin for that matter).
Next I made some pouches for a pad of paper and crayons so they can write or draw.
I finished off each tin with a special new small toy. Overall cost of each tin came out to about $15 each. Now when we are headed out, I can tell the kids to grab their tins and put a couple of small toys inside to bring along and we'll be all set to be entertained. The only downside - metal tin buckets are not necessarily very quiet, but they do make really good drums!
Subscribe to:
Posts (Atom)