About me

Hi! I'm Shelly - mother of 5 and wife to the best man in the world. We love to play games and watch movies together. I have a passion for crafting in all it's forms - sewing, scrapbooking, bow making, painting, mod podge, you name it and I'll try it. Hope you enjoy our family adventures and crafts!

How I Became Shared Jelly

When my husband and I first got married we used to get messages on our answering machine for "Shared" and "Jelly" instead of Jared and Shelly. The first time we chuckled a little over it and by the fourth or fifth time, we decided the name should stick somewhere. And so, I've been sharing jelly all over the internet since. Enjoy!

Pages

Showing posts with label Home Decor. Show all posts

Friday, March 23, 2012

Updated Birdhouse

We had an exchange of household items at a church activity the other week.  You bring some stuff you don't want, I bring some stuff I don't want and we swap.  I picked up this beauty knowing I needed some more spring decor.
The colors weren't what I wanted and the style was not really my taste, but I knew it had potential (and it was free!)  Here's how it turned out after a little paint (several coats) and some cute paper (attached with mod podge).


Love it!

Thursday, November 17, 2011

Candy Dish

I actually saw this idea on a craft blog and then we did it for a project at church.  I was excited that I didn't have to go buy the stuff, I just got to put it together.  To make this, you need a flower pot and dish (painted in the color of your choosing), a wooden knob (for the top handle) and a small glass dish.  Embellish it however you like.  Great for any holiday.

Monday, November 7, 2011

Chevron Quilt

I finally got around to making a chevron quilt for my son's room.  I knew that I wanted to do this - it was what inspired me to do the zig-zag stripe around his room.

I got the idea from The Crafty Cupboard:

I wish mine turned out as perfect as hers. I found out that finding orange fabric at Joann's is really hard. They have very little to choose from and I used mainly fat quarters and solid colors.  Should have kept to lighter prints, too.  Oh well, it still has the overall effect I wanted.
Just new curtains left for this room makeover to be complete!

Sunday, November 6, 2011

New Hair Bow Holder

There are a million hairbow holders out there. I went for this one based on it's clean lines.  Plus, it's easy to make:

I made a new hairbow holder for my girls' bows based on my friend Kristin's holder.  I started with some fabric, a canvas and some ribbon.
Pull the fabric over the front. Pull tight and staple in the back.

Then line up the ribbons how you want.  You can criss cross, do straight lines, random, whatever. I chose straight lines, so I measured and marked how far apart I wanted them. Then I stapled them tightly to the back just like the fabric.

That's it!  

Just hang it and you're done.

  Now I need to update my bows.  (Out with the old, in with the new)

Thursday, September 29, 2011

Halloween Subway Art

My dad made me a new box garden and left me with some leftover boards from his project.  When I saw this on Tatertots and Jello, I knew I wanted to make one with the board he left me.

I had black and white vinyl, so I did mine orange instead.  I used my fabulous Silhouette to cut it all out and put this baby together.  I think mine will have it's resting place somewhere on my porch, but for now, it is propped against my wall waiting for a permanent home.
It was my sweet daughter's idea to make it into a pumpkin (because it was orange) so I tied some green ric rac to the top.

Tuesday, September 27, 2011

Autumn Front Porch

My in-laws gave me this old bench they had.  I was excited to give it a home on my porch for my autumn decorations.  I see paint in it's future, but I'm not sure which color?  Hmm.......   I'm excited for the holidays and decorations again, though.  The next three months will be decoration filled for sure!
It's the new home for my cloth pumpkins I made last year.Yay!

Monday, September 26, 2011

Felt Flowers

Just wanted to show you some ways to make cute felt flowers I used in my fall wreath.  All you need are some long strips of felt.  My smaller flowers were made from 13 inch strips, the larger ones were about 30 - 40 inches (left over from some felt yardage I had from my Thanksgiving Countdown Calender).

#1 Rolled Flowers
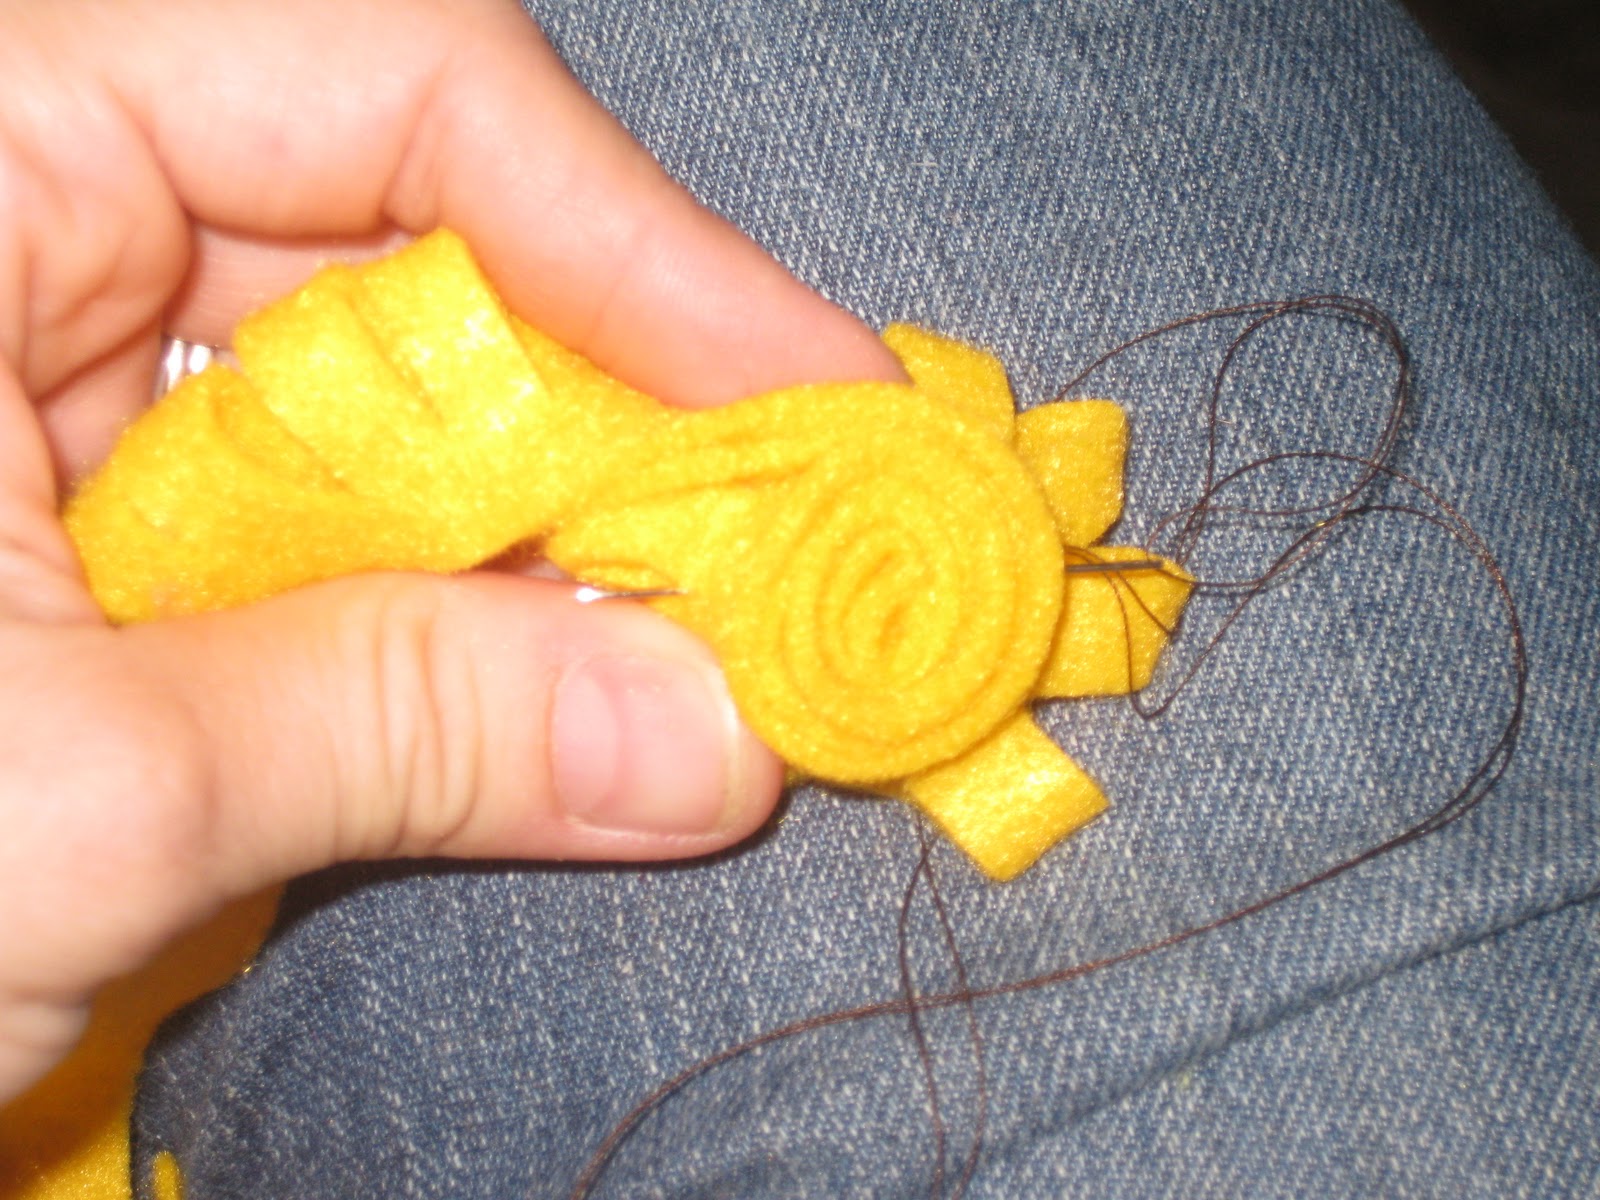
For this flower, you simply roll strips about 1/2 inch thick.  You can do it with straight or wavy strips. 

You simply start with one end and roll up the strips.  Here is what the straight one will look like when it is rolled up:
 Here is the wavy strip once it is rolled up.  Just a little more texture.
I used a needle and thread to put some stitches trough the roll to secure it in place.

#2 Rolled Petal Flowers
Start with a strip cut about 1 1/2 to 2 inches wide.
First you are going to fold it in half lengthwise and cut notches in.  Make sure you don't cut all the way through.  It should look like this
Once you have cut notches in the entire length, you roll it like you rolled the others. 
This time the notches you made will form petals.  Stitch it as you go from the back to keep it secure.

When you are finished rolling, it should look like this

And from the back, you can see all my stitches in brown.

#3 Rolled Flower From Scraps
For this type of flower, I took my crazy leftover scraps from other projects.  You can see that I had cut out circles from this red felt in the past.
I rolled up these scraps along their edges like this

When I was done, the back wasn't flat.  It was all messy like this
So I just cut it straight and then stitched my flower together
#4 Circle or Scalloped Edge Flowers.
For the last kind of flower you can either cut out circle in varying shapes and stack them or look online for a free flower template and use it to cut out flowers. I'm sorry I didn't save the link from the one I found.  Anyways, you cut them out, stack them and put a secure X stitch in the middle.


All in all the flowers are pretty easy to make and take very little sewing skill.  You could easily make these and stick them to just about any project you wanted with a little hot glue.  

Saturday, September 24, 2011

Autumn Wreath

I wanted to make a new wreath for Autumn.  My inspiration came from these two ideas.

I had some brown burlap and a large embroidery hoop that I rarely use.  I also really liked the felt flowers from Nest of Posies.  So I melded the two ideas and came up with this.

I didn't glue the burlap into the hoop or anything, so I can easily take it out and use the hoop after I'm done with it.

I cut the word Autumn out on freezer paper using my Silhouette.  And I painted on my own stencil.  For more info on how to do freezer paper stencils visit this link for a tutorial.  There are dozens of tutorials for freezer paper stencils if you need help.

Soon I will post up my tutorial of how to make all these fun felt flowers.

Tuesday, September 13, 2011

Bench Covers

My husband and I were so excited when we purchased our first NEW furniture item two years ago when we bought our house.  We have been married for 10 years but have always bought things from thrift stores or gotten hand-me-downs from other people. Well, we always have wanted a square dining table with bench seating  and they are really hard to come so when we found it at a random furniture store in Orange, we knew it was meant to be ours.

2 short years later, it has been roughly loved by our 5 children.
Our two littlest boys learned how to "draw" in the table with their forks (big time trouble for that one) and the leather benches just aren't meant to be jumped on by little legs.  After many months of this:

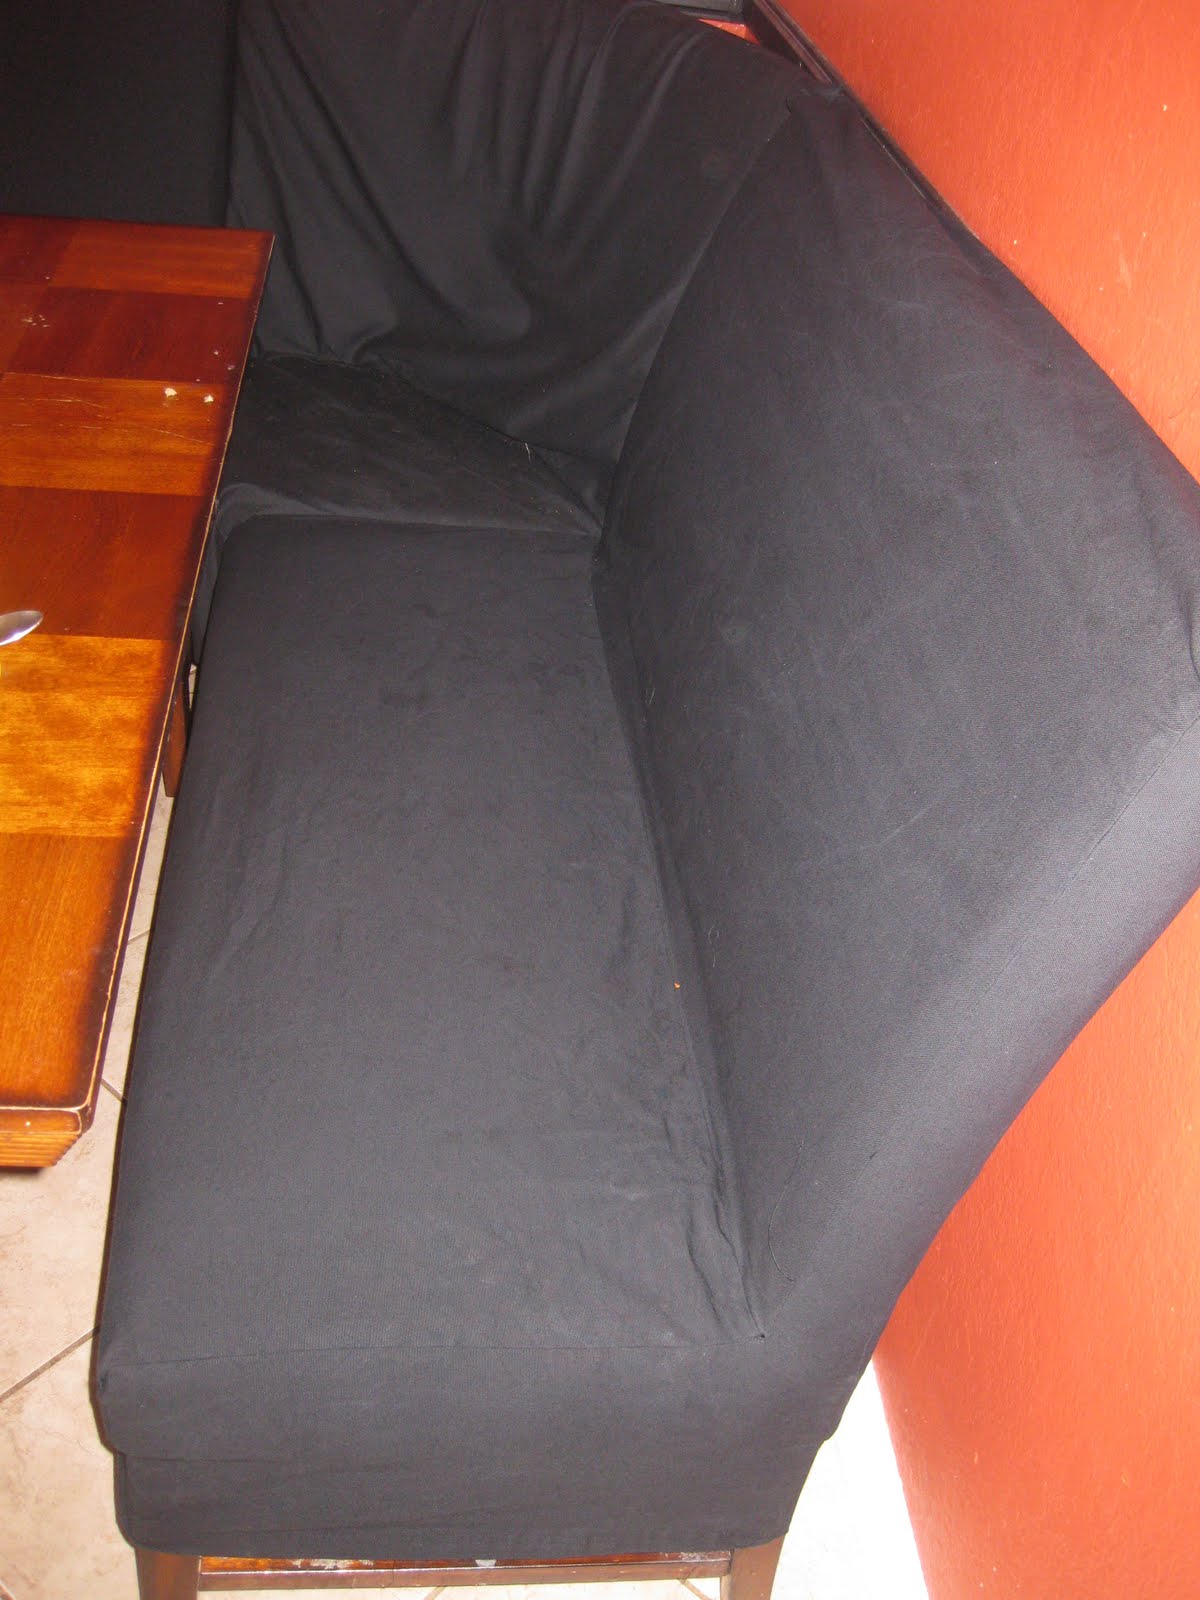
Trying to hold the seams together with duct tape and keep the kids from peeling the leather off with their little busy fingers, I finally made some black fabric covers to hide the wear and tear.

It's removable, washable and fits well -except for the corner piece that was very hard to figure out due to it's weird shape.  I waited until the home decor fabrics went on 60% off at Joann's so it wouldn't hurt the wallet quite as bad.  I'd say this was a much better solution than buying a new dining set.  I think I will eventually do something in a print on the two remaining leather chairs, but for now I thought I'd share my project with you.

Sunday, August 28, 2011

Beach Themed Mantle

I've seen so many cute beachy mantles and I wanted to try it out.  I'm finally getting around to taking down my Fourth of July summer decor and it's too early to put up my fall stuff, so  I went for it.  I was able to put this together with all stuff I had lying around - including a new "Relax" sign that Jared and I picked up in Catalina.  I need to think of something to put in the glass at the back though.  Might need to go looking for a pretty candle or something.  hmmmm. . . .
I made this sign out of an old board in my garage. It was cut all crooked which gives it a little more character.  I painted it white then used a dry brush technique with some brown to antique it.  I cut the letters out of some scrapbook paper using my silhouette and mod podged them on.   I would have rather done it with vinyl to be quicker, but the only colors I have are white, black and red.  I wanted a beachier color.  Anyways, I  think it turned out pretty good.  Jared said, "It's almost there, but not quite"  Thanks for the support, honey.

Thursday, June 30, 2011

New Curtains

While I was painting my oldest son's room, I realized that it is not the only room that needs a little more attention in the home decor department.  The other two rooms could use a little love, too.  Both the other kids' rooms are green (not avocado).  My daughter started with a green/pink interior.  I love the green and pink, but the curtains that I originally made for her room left a lot to be desired.  I had this great idea of using sheer pink curtains, but the fabric was terrible to work with and they didn't come out very great.  I've left them in the room, even though I hated them, while I've worked on tons of other things in the house.  Now that my little girl is a little bigger, she doesn't really like pink anymore, either.   So - new look needed!  We are now going with a turquoise and green look and I'm starting with the curtains that are desperately in need of help. (Sorry about the daytime pictures. Didn't realize how hard taking pictures of curtains is.  I need to try again at night)

These are the curtains before:
These are the new curtains:
Here is a little close up of the fabrics I used:


There will be new elements in the room eventually to reflect the change better, but this is a good start and a good inspiration to help the rest of the room.  I can tell you, though, that I'm not really going to be happy with this room until we can take out the crib and get a bunk bed.  This room has way too much furniture.

Wednesday, June 29, 2011

Patriotic Pinwheels

I saw a really good tutorial for these on Funky Vintage Lovely.
The only thing that I was really bummed about is that I couldn't find any pretty double-sided paper like she did.  I have really got to find a good scrapbook store in my area.
Anyways, I really like how they turned out.  They are pretty and add some fun texture on my wall, too.

Sunday, June 26, 2011

Last Room in My House

Since we've moved in a couple of years ago, we have painted just about every room in the house - until now.  I officially completed painting the very last room. Some of the rooms in this house were painted with only one coat and you could see every single brush stroke.  Others were just painted with unattractive colors.  Case in point:
They painted this lovely avocado green in the window sills, on the door frames, everything.  Needless to say, not my favorite, not what I wanted to work with. (This was the same color that my bathroom was before I painted it, too.  They painted it on the vanity, doors and ceiling in there.  wow!)
Anyways, this is my oldest son's room slash my craft room.  He's so nice to share his closet with me.  We originally were thinking about doing an orange - we both love orange - but as I was searching for inspiration rooms online, I found another cool alternative. 


The color is called shark gray.  Then we finished with "Coffee Whip" orange for a cool zig zag stripe around the room.  It was my first time taping off and trying to paint like this. It turned out well, though.  I've been seeing so many projects with chevron stripes lately and I really like how the blueish gray and orange compliment each other.  Next on the list for this room makeover are new curtains and matching bedspread to go with the orange accents.

Monday, April 4, 2011

Paper Bag Flooring!?!

I don't often post things that I haven't made myself, but I am blown away by this one.  I saw this post and it makes me wish I had stairs or a place to do this.  So cool!  This flooring is actually made from paper bags.  I can hardly believe it.


You can read the details of how it is done at Tater Tots and Jello.

Friday, April 1, 2011

Spring Banner


I picked up this cute FREE printable banner from At Second Street. 

Adds just the right feel for spring time!