
Friday, December 31, 2010
Happy New Year
Wanted to wish all my friends and family a HAPPY NEW YEAR! Can't believe it is going to be 2011 already.

Wednesday, December 29, 2010
Temple Block

Monday, December 27, 2010
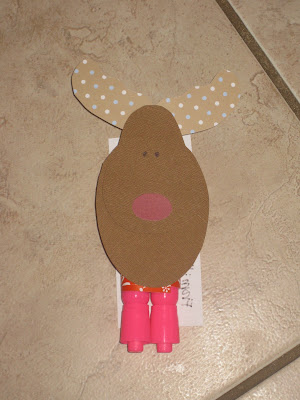
Our New Toy

Sunday, December 26, 2010
Scripture Case


2 7x9 for outside
1 4x24 for outside
1 9x10 for outside flap
2 7x9 for bag lining
1 4x24 for bag lining
2 5x9 for bag pocket
1 9x10 for flap lining
I also used velcro instead of a magnet because I had it on hand already. Hunter loves it and always wants to read his big scriptures now (instead of the picture book ones).
Friday, December 24, 2010

New Purse/Diaper Bag

On the bag, it has a wide pocket for my diaper changing pad.


Thursday, December 23, 2010

Tuesday, December 21, 2010
Believe Banner
Picked up this cute printable banner on At Second Street. I like how it looks with my snowflakes on the wall. You can make your own, too.


Baby Gifts - "Touch and Feel Book" and "Bibs"
My baby girl likes the touch and feel books. I know all of you are thinking, "Okay, Shelly, so just go and buy one." Well, I'm weird. I love home made stuff and why buy when you can make. It's more fun for me. I realized that I had a lot of good fabrics with different textures and I wanted to try out making a book out of mod podge, so here is what I came up with.
I started with some super cute paper.
 It is double sided with cute patterns. I used the mod podge to put animals on the pages, then sewed fabric swatches for the texture over the top of the animals.


For the back sides of the pages, I mod podged shapes over the stitches so that they aren't as noticeable.

The fun thing is that the mod podge makes the paper flexible without tearing or getting creases. I let Aliza test out a couple of the pages and they held up quite well.


Here's the orange one after she crumpled it. You can just smooth it back to it's shape.

I bound them together (and forgot to take a picture before I wrapped it). Hopefully I'll take a picture for you and post it later.
I also made some fun bibs for her. The colors are a little funky because I used a lot of my left overs, but they will just get gooey anyways, right?
 I especially like the apple and splat bibs. I thought they came out cute.
I started with some super cute paper.


For the back sides of the pages, I mod podged shapes over the stitches so that they aren't as noticeable.

The fun thing is that the mod podge makes the paper flexible without tearing or getting creases. I let Aliza test out a couple of the pages and they held up quite well.


Here's the orange one after she crumpled it. You can just smooth it back to it's shape.

I bound them together (and forgot to take a picture before I wrapped it). Hopefully I'll take a picture for you and post it later.
I also made some fun bibs for her. The colors are a little funky because I used a lot of my left overs, but they will just get gooey anyways, right?

Sunday, December 19, 2010
Nativity Hand Puppets

Saturday, December 18, 2010
Wednesday, December 15, 2010
Holiday Candy Train
Instead of making the traditional gingerbread house, we changed things up a little bit this year. We used to make candy trains in my family when I was little, so that is what we made this year.
 Hopefully you can make out the train in the middle. It has sour straw tracks and M & M wheels and is surrounded by a forest of
 candy trees and flowers. It was a lot of fun to make and it will be even more fun to eat over the next week. Yummy!

Holiday Gift for Teacher
I came up with this little idea of what to give my kids' teachers for the holiday.


Monday, December 13, 2010
Holiday Snowflakes
I really like to help the kids make crafts for the holidays. This is one of the easiest and most fun for my kids.
We made this fun snowflakes to line our wall.
 I like to make my snowflakes out of coffee filters because they are round, thin and cheap. Nice, right? If you don't know how to make them, here's a quick tutorial.
 Start with one coffee filter and fold it in half.
 Then fold it into thirds (just eyeball it and do your best to line up the edges.
 Then fold it in half one more time.
 Now cut along the folded edges. You can cut just about anything you want, but don't cut from one folded edge across to the other folded edge. You can cut the tip if you want a design in the very center. Here's how I cut one.
 And here is what it looks like unfolded.
 It's super easy for the kids and each one is unique and beautiful. I just love them.

 Just be ready for lots of little bits of paper to clean up afterward. I just let my vacuum do the work - thanks Dyson!
We made this fun snowflakes to line our wall.


Letters To Santa

Friday, December 10, 2010
Jeans into Miniskirt
Made this for my Mikyla. Took some old jeans with holes in the knees and turned it into this cute jean skirt.


Easy-To-Make Wallet
I made some cute little wallets for my kiddos for Christmas this year. I'm tired of them not having a place for their money and tired of the cheap kid wallets from the store that fall apart at the seams.
Here is what I came up with:
It has a place for the bills, a pocket for whatever card or papers they want to put in and a velcro pocket for the coins.
 I also made felt letters on the front as a monogram so they know who's is who.


Want to make one of your own? Here's my tutorial.
I started with:
2 rectangles 5" x 8" (for outside)
2 rectangles 4 1/2" x 8" (for inside 1)
2 rectangles 3 1/2" x 8" (for inside 2)
2 small rectangles 3 1/2" x 2" (for the inside flap)
2 rectangles 2 1/2" x 2" (for the strap to close it)
some velcro
Felt Letter if you want to personalize it.
I started by stitching on my letter on the front as well as sewing the velcro (soft side) to the outside of my wallet like so.
 Put that aside and sew the other side of your velcro to one of your strap pieces.
 Sew together the strap by putting your two pieces with right sides together and sewing around three sides like so:
 Next, work on your inside flap, doing the same as you did on the strap

 lip off the sewn corners so that when you turn them right side out they can lay flatter.
 Turn right side out and set aside
Get your fabric rectangles for the inside of your wallet. Line up the two 4 1/2" x 8" rectangles with right sides together. Sew along one of the long sides (this will be the top of your pocket inside). Repeat with the 3 1/2" x 8" rectangle.
 Turn the right sides out and press flat with an iron. You should now have these four pieces sewn. (you can top stitch along your sewn edge if you like how that looks)
 Line up your two large rectangle pieces on top of one another. Use your flap to line up where to put the other side of your velcro on the wallet (making sure to allow room for a seam on your right edge)
 First, you will sew on your other side of velcro, then fold over the unfinished end of your flap to sew onto the larger rectangle and sew a seam up the middle to divide your pockets (as seen above).
Next you are going to layer all your pieces to sew them together. Starting at the bottom. Place your largest rectangle (for the outside) without your velcro and letter right side up on your work surface. Next you will lay your sewn together rectangles for the inside. Next, place your strap half way up along the right side with your velcro facing down.
 Finally, you are going to lay the outside piece left on top - right side down with your velcro and letter on the left side.
 Pin around the edges. You are going to sew along the right, bottom and left edges leaving your top open. as so:
 Clip the sewn edges like before and turn the wallet right side out and you will have this.
 Now fold over your top edges to the inside of your wallet. Sew along this for your top seam.
And you are finished. You have a cute little wallet for your little one.
I made four different ones in all different colors. It was a fun and quick project using scraps I already had on hand. Perfect for a stocking stuffer or last minute gift.
Here is what I came up with:
It has a place for the bills, a pocket for whatever card or papers they want to put in and a velcro pocket for the coins.


Want to make one of your own? Here's my tutorial.
I started with:
2 rectangles 5" x 8" (for outside)
2 rectangles 4 1/2" x 8" (for inside 1)
2 rectangles 3 1/2" x 8" (for inside 2)
2 small rectangles 3 1/2" x 2" (for the inside flap)
2 rectangles 2 1/2" x 2" (for the strap to close it)
some velcro
Felt Letter if you want to personalize it.
I started by stitching on my letter on the front as well as sewing the velcro (soft side) to the outside of my wallet like so.


Get your fabric rectangles for the inside of your wallet. Line up the two 4 1/2" x 8" rectangles with right sides together. Sew along one of the long sides (this will be the top of your pocket inside). Repeat with the 3 1/2" x 8" rectangle.


Next you are going to layer all your pieces to sew them together. Starting at the bottom. Place your largest rectangle (for the outside) without your velcro and letter right side up on your work surface. Next you will lay your sewn together rectangles for the inside. Next, place your strap half way up along the right side with your velcro facing down.


Subscribe to:
Posts (Atom)